The first year of gardening can feel overwhelming. Books and articles assume some baseline knowledge; experienced gardeners forget what they did not know. New gardeners often start strong in spring then lose momentum by midsummer when problems accumulate faster than answers.
A clear month-by-month roadmap reduces the overwhelm. This guide walks through a typical first year in a zone 5-7 garden, with specific tasks and what you should reasonably expect at each stage. Adapt timing 1-2 weeks earlier or later for your specific climate.
February-March: planning
The first season really begins in late winter, even though the visible garden does not yet exist. The planning month determines almost everything.
Decide what to grow. For a first-year garden, the standard recommendation is 4-6 reliable crops in a single small bed (4×8 raised bed is ideal). Cherry tomatoes, bush beans, lettuce, basil, herbs, and garlic make an excellent first-year mix.
Site selection: look for an area with at least 6 hours of direct sun, reasonable drainage, and easy access to a water source. South-facing is ideal; east-facing works well too.
Order seeds. For a small first-year garden, 4-6 seed packets is plenty. Choose proven varieties (the seed company website often labels these “best for beginners” or “recommended”).
Consider whether to start your own seedlings indoors or buy transplants. For a first year, buying transplants is easier; starting your own seeds adds complexity that is better saved for year two.
March-April: preparing the space
Build the bed and prepare the soil before planting season arrives. Most of the heavy work happens here.
- Build the raised bed (or prepare in-ground area)
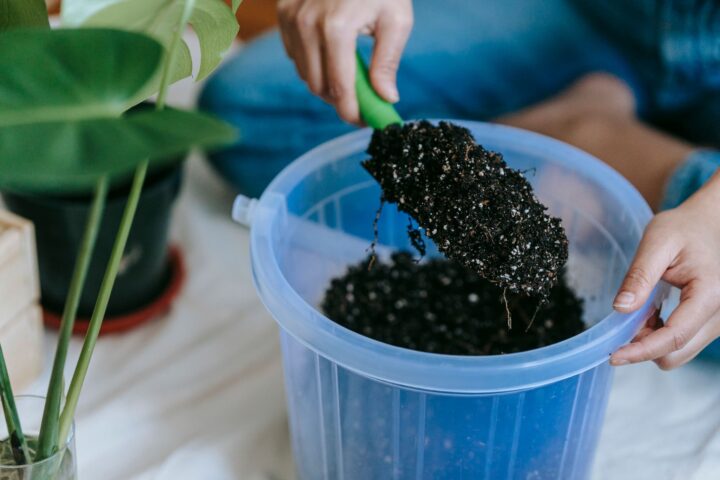
- Fill the bed with quality soil mix (1/3 compost, 1/3 garden soil, 1/3 leaf mould or aged manure)
- Plan the layout. Tall plants at the back (tomatoes); medium in middle (lettuce, beans); herbs and ground-level along front
- Install drip irrigation if using
- Plant cool-season crops (peas, spinach, lettuce, radishes) in early April once soil is workable
- Direct seed lettuce and radishes for early harvest
May: the main planting
After your last frost date (mid-May in zone 6), the main warm-season planting begins.
- Transplant tomatoes and basil into the garden after frost is past
- Direct seed beans, summer squash, basil seeds in late May
- Install support structures (tomato cages, bean trellis) before plants need them
- Begin daily morning garden walks
- Apply organic mulch (straw) once soil has warmed
- Water deeply twice a week if drip irrigation is not set up
June: settling in
The plants establish and begin producing. Maintenance becomes routine.
- Daily morning garden walks (5 minutes)
- Continue consistent watering
- Hand-pick visible pests as they appear
- Harvest lettuce and early greens as they mature
- Pinch flowering basil to keep leaf production going
- Tie tomato vines to supports as they grow
- Begin succession planting (lettuce, radishes) every 2-3 weeks
- Side-dress tomatoes with compost when they begin to flower
July: peak season
The garden is in full production. Daily attention and harvest dominate.
- Daily harvest of beans, tomatoes, squash as they ripen
- Continue daily walks (problems happen fast in summer heat)
- Maintain consistent watering through hot weeks
- Apply Bt to brassicas if cabbage worms are present
- Watch for tomato hornworms (large caterpillars with horn-like tail)
- Begin pulling and disposing of spent spring crops to make room for fall planting
- Start fall seedlings indoors mid-month (broccoli, kale, fall cabbage)
August: shifting focus
The garden begins to transition. Some summer crops wind down; fall crops begin.
- Continue summer harvest (tomatoes peak now)
- Plant fall transplants (broccoli, kale, cabbage) by mid-month
- Direct seed fall lettuce, spinach, beets, carrots
- Begin preserving excess harvest (freezing, drying, fermenting)
- Watch for late-summer pest issues (squash bugs, spider mites)
- Apply mulch to fall plantings as you go
- Begin planning autumn cleanup
September: autumn transition
Cool weather returns. Garden activity shifts to harvest and preparation for next year.
- Continue harvest of remaining summer crops and emerging fall crops
- Pull spent tomato plants and other warm-season crops as they finish
- Compost healthy plant material; trash diseased material
- Plant garlic in early-to-mid October for next year’s harvest
- Apply 2-3 inches of compost as autumn top-dressing
- Plant overwintering cover crop on bare soil
- Save seeds from open-pollinated tomatoes, beans, lettuce
October-November: cleanup and prep
The growing season winds down. Cleanup and preparation for next year.
- Complete harvest of fall crops before hard freeze
- Pull remaining annuals and add to compost
- Apply row cover to extend harvest of hardy greens
- Cut back perennials (or leave standing through winter for wildlife)
- Drain hoses and irrigation systems; disconnect spigots
- Sharpen and clean tools for storage
- Take notes on the year’s successes and failures
What to expect from a first year
Realistic expectations matter. A first-year garden typically produces:
- Several pounds of beans across the season
- A few dozen pounds of zucchini (one or two plants is plenty)
- Several pounds of cherry tomatoes from each plant
- Continuous lettuce for several weeks of meals
- Abundant herbs for cooking
- A useful amount of garlic for next year (if planted in autumn)
The hardest part of year one
Three challenges trip up most first-year gardeners.
Inconsistent attention. The garden gets daily attention in May and June, then less in July when other life commitments compete. The garden suffers, problems accumulate, and the season feels harder than it should.
Unexpected pest issues. A first-year garden often experiences some pest problem the gardener was not prepared for. Patience and basic interventions (hand picking, water blasting, occasional Bt application) handle most of these.
Weather extremes. A heat wave, drought, or unexpected late frost can damage first-year gardens. The plants typically recover; the gardener’s confidence sometimes takes longer.
The first year is a learning year. The actual production is meaningful but secondary to the experience built. Year two is dramatically better; year three is when gardening starts to feel natural.
A first year of gardening is a learning project that happens to produce food. Follow the roadmap, accept some failures, take notes for next year. By autumn, you have a useful harvest plus a much better understanding of your specific garden than any book could provide. Year two builds on this. Year five, gardening feels routine and the rewards compound annually.
Related reading from the journal
For more along these lines, see Building a Garden Habit That Outlasts the Novelty, Daily Garden Routines That Take Five Minutes, and Five Beginner Gardening Mistakes Worth Avoiding.
Further reading
Trusted references we consulted while researching this piece. All external.