A worm bin gets compared to an outdoor compost pile, and that comparison sells worms short. Vermicompost (the soil-like material worms produce) is among the finest fertilizers any home gardener can have. It is roughly five times higher in available nutrients than ordinary compost, contains beneficial microbes that suppress plant disease, and adds humic acids that improve soil structure for years after application.
A small worm bin in a corner of a kitchen, laundry room, or garage processes kitchen scraps year-round, even when the outdoor pile is frozen solid. We have kept worm bins of various sizes for five years now. The setup is simple, the maintenance is almost nothing, and the output is remarkable.
What you are actually getting
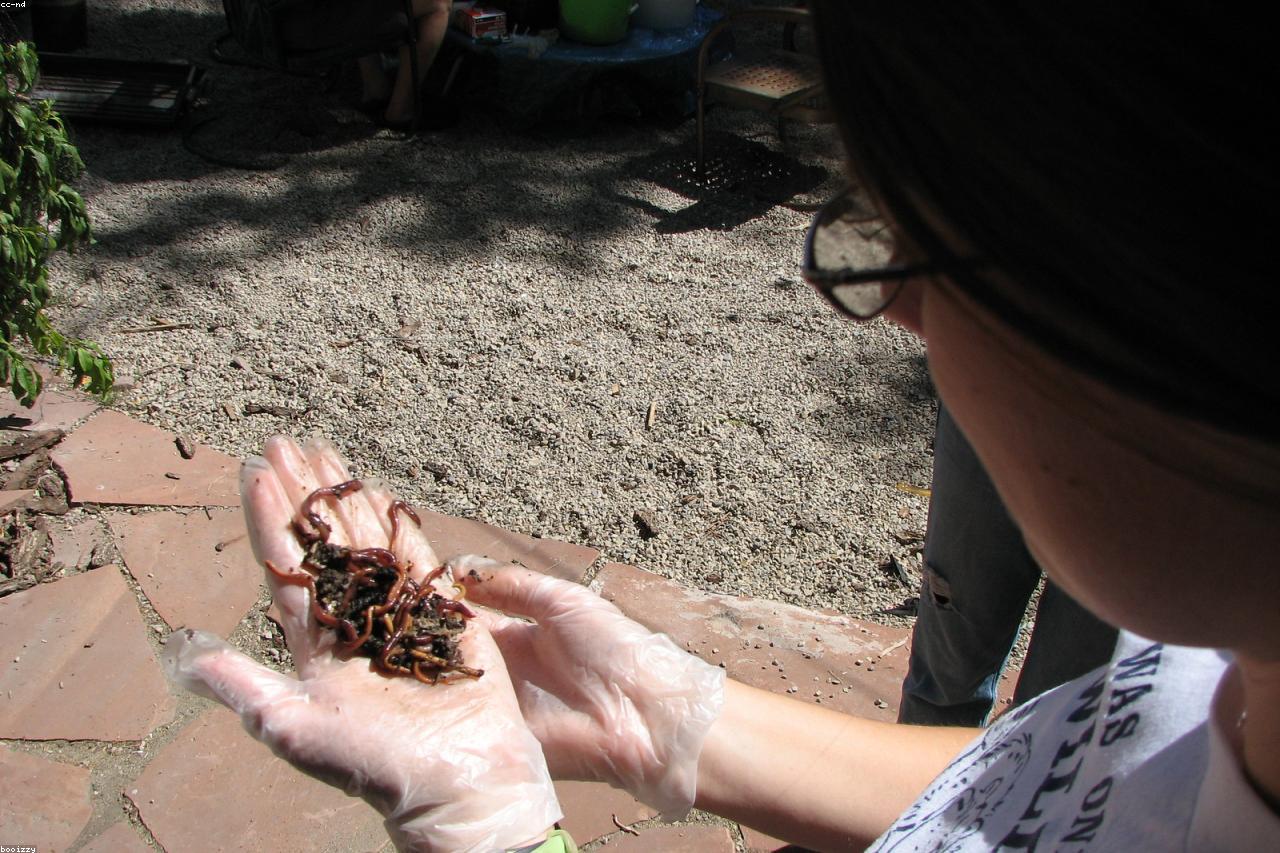
A working worm bin contains hundreds (eventually thousands) of red wigglers (Eisenia fetida), which are the species specifically suited to consuming decomposing organic matter at room temperature. They are different from earthworms (Lumbricus terrestris), which live in soil and do not work well in bins.
Red wigglers consume roughly half their body weight in food per day under good conditions. A starter colony of one pound of worms (about a thousand individuals) processes a quarter to half pound of kitchen scraps daily; enough for a small household.
The bin produces two valuable outputs: vermicompost (worm castings, the solid soil-like material) and worm tea (the liquid that drains through the bin, often called leachate). Both go directly onto plants. Both are remarkable.
The simplest practical bin
You can buy a layered commercial bin (Worm Factory, Hungry Bin, others) for $80-$200. Or you can build a basic bin from two plastic storage containers for under twenty dollars. Both work; the commercial bins are tidier and process more quickly thanks to their multi-tier design.
- Two opaque plastic storage bins of the same size (10-15 gallon capacity)
- A drill with a 1/8″ bit
- Shredded newspaper or cardboard (a generous bag full)
- A handful of garden soil
- One pound of red wigglers (mailed or from a local source)
The build, in twenty minutes
Drill twenty or thirty 1/8-inch holes in the bottom of one bin, and twenty more around the upper sides for ventilation. Drill no holes in the second bin; it sits underneath the first to catch any liquid drainage.
Fill the holey bin three-quarters full with damp shredded newspaper or cardboard. The bedding should feel like a wrung-out sponge: damp but not dripping. Sprinkle a handful of garden soil throughout to introduce beneficial microbes.
Add the worms to one corner of the bedding. Give them a small starter meal (a few cups of vegetable scraps) buried under bedding in the opposite corner. Cover with a few more sheets of damp newspaper. Place the lid loosely.
Set the bin on top of the second container, leaving a small gap for airflow. Find a quiet spot at room temperature (60-75F is ideal) out of direct sunlight. A kitchen corner, laundry room shelf, or basement spot works well.
Feeding the bin
Feed the bin small amounts at a time, burying each addition under bedding so it does not attract fruit flies. Aim for roughly half a pound of food per pound of worms per day, but worms self-regulate; if uneaten food piles up, you are overfeeding. If the bedding starts looking like soil and there is no visible food, you are underfeeding.
The diet for worms is similar to outdoor compost but more sensitive. Feed: vegetable and fruit scraps (avoid heavy citrus and onion), coffee grounds and filters, tea bags, eggshells (crushed), shredded paper and cardboard, plain grains, garden trimmings. Avoid: meat, dairy, oil, salt, citrus peel in any quantity, onion in any quantity, spicy peppers, and pet waste.
Harvesting castings
After three to four months, the bedding will be replaced by dark crumbly worm castings. There are three reasonable methods for separating worms from castings.
The migration method: push all the contents to one side of the bin and add fresh bedding and food to the empty side. Over two to three weeks, the worms migrate to the new food, leaving castings behind. Scoop out the castings.
The light method: dump the bin contents onto a tarp under a bright light. Worms (which avoid light) dive to the bottom. Scrape off the top inch of castings every few minutes. After thirty minutes, the worms are concentrated in a small mound at the bottom; return them to a freshly bedded bin.
The tower method: in a layered commercial bin, simply add a new tray on top with fresh bedding. Worms migrate up through the screen, leaving castings in the lower tray. This is the easiest method and the main argument for buying a commercial bin.
Using the output
Vermicompost can be applied at one to two cups per square foot of garden soil. Mix into the top inch when planting seedlings. Top-dress around established plants in mid-season for a noticeable mid-summer boost. Use as a component (about ten to twenty percent by volume) of any potting mix.
Worm tea (the leachate from the bottom bin) can be diluted ten parts water to one part tea and used as a foliar spray or root drench. Apply weekly during active growing season for best results.
A single small bin produces about five gallons of castings per year, which sounds modest but is genuinely useful when applied to where it matters most: starting seedlings, planting transplants, top-dressing heavy feeders like tomatoes.
A worm bin is one of the most quietly satisfying garden additions we have ever made. It processes kitchen scraps year-round, it produces an extraordinary fertilizer, and it asks for almost nothing in return. Start with a basic bin and a single pound of worms and see what you think after one season.
Related reading from the journal
You might also appreciate Bokashi vs Traditional Composting: Which Suits Your Kitchen, How to Build a Three-Bin Compost System That Lasts a Decade, and Coffee Grounds, Eggshells, and Other Garden Myths Worth Reconsidering from the journal.
Further reading
Trusted references we consulted while researching this piece. All external.